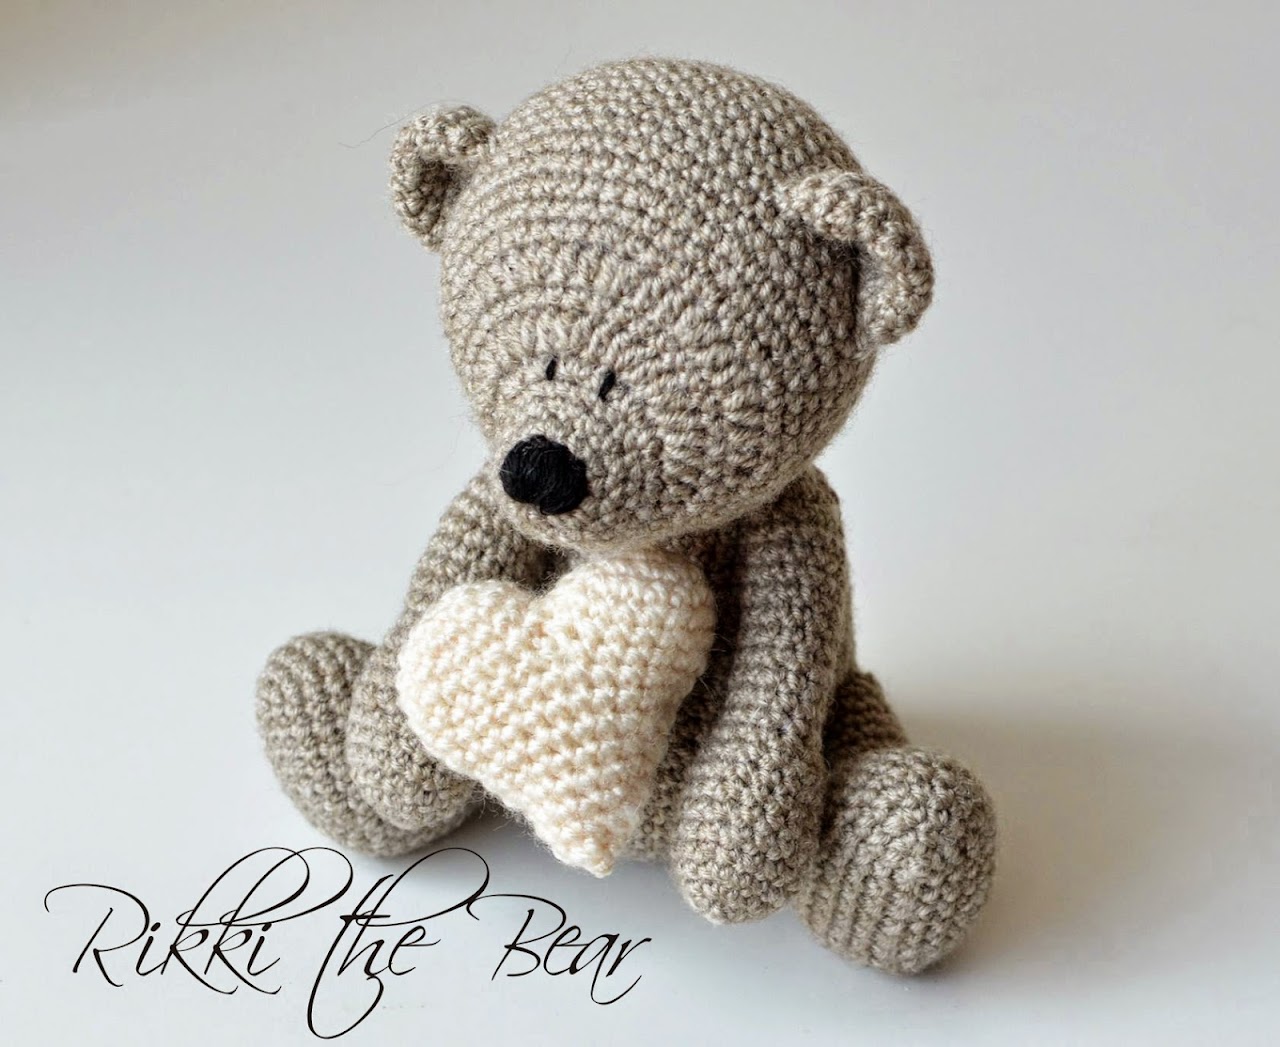
The prototype of my Rikki bear was Mike. I tried to make a bear with a nice round belly and it seems like it turned out well.
It is very exciting to experiment with different shapes. And it is also amazing you can crochet any shape using just single crochet stitches. But I decided to also try using half double crochet stitch to shape bear’s head. And you can see how it worked with my Rikki. The pattern is already available in my Ravelry and Etsy shops. So if you like little cute bears as much as I do – you can make it :) This pattern is very easy to follow, with lots of progress pictures. I wrote it with Advanced Beginners in mind.
Stitch guide
ch – chain stitch
sc - single crochet (insert hook in indicated stitch, yo, draw up a lp, yo and pull through both lps on hook).
sc3tog - single crochet 3 together (*insert hook in the indicated stitch, yo, draw up a loop* 3 times, pull 4th loop through first three on hook).
dec - decrease (insert hook in the indicated stitch, yo, draw up a lp, insert a hook in next st, yo and pull through both lps on hook).
inc - increase (crochet two sc in the same st).
** - *crochet following directions* as many times as indicated.
Copyright LillaBjornCrochet 2015. All rights reserved. This pattern is for unlimited personal use only. Do not reproduce or sell the pattern. The pattern may not be copied in any way (print or digitally), in part or in full. Items may be sold that are made from this pattern as long as the designer is credited. Shop owners, if you wish to make a kit with yarn using this pattern, please request permission and copyright details from me before offering any kits for sale. Please, read Copyright page for more information.Instructions
Add this Pattern to your Ravelry QueueRnd 1. Make a magic ring, ch1 (doesn’t count as a st) and 6 sc in magic ring. (= 6 sc)
Rnd 2. Skip ch1 and make 2 sc in every stitch of rnd 1. (= 12 sc)
Rnd 3. *1 sc, 1 inc* 6 times. (= 18 sc)
Rnd 4-5. 18 sc. You will get a first “cup”. Remove the hook from a loop, cut the thread leaving approx. 25 cm (10 inches) tail. You will need it later to attach the two cups.
Crochet 2nd “cup”, insert marker in the last st of the round, drop a loop off the hook but don’t fasten yarn off.
Place both cups facing with the right sides combining the loops (the 1st cup will be behind the second). Place the loop of 1st (behind) cup on hook, insert the hook in the next st of both 2nd and 1st cup (through both layers) and make 1 sc using yarn tail of 1st cup. Make 4 more sc in the same way through both layers, fasten off.
Place the loop of the 2nd cup on hook. Now you will be crocheting around both cups. Don’t forget to move the marker to the last stitch of each new round as crocheting progresses.
Rnd 6. 13 sc on 2nd cup, 15 sc on 1st cup, 2 sc on 2nd cup. (= 30 sc)
Rnd 7. 4 sc, 1 dec, 13 sc, 1 dec, 9 sc. (= 28 sc)
Rnd 8. 4 sc, 1 dec, 12 sc, 1 dec, 8 sc. (= 26 sc)
Rnd 9. 3 sc, 1 sc3tog, 10 sc, 1 sc3tog, 7 sc. (= 22 sc)
Rnd 10. 22 sc.
Rnd 11. 2 sc, 1 sc3tog, 8 sc, 1 sc3tog, 6 sc. (= 18 sc)
Rnd 12. 1 sc, 1 sc3tog, 6 sc, 1 sc3tog, 5 sc. (= 14 sc)
Rnd 13. 14 sc. Stuff the heart.
Rnd 14. 1 sc3tog, 4 sc, 1 sc3tog, 4 sc. (= 10 sc)
Rnd 15. 5 dec. (= 5 sc)
Cut thread leaving approx. 20 cm (8 inches) tail. Sew in the hole using a needle and this yarn tail. When finished, pull the tail inside the heart.
Congratulations! Your heart is now finished!
p.s. My Rikki the bear, Rosa the sheep and Peter the bunny were invited to have a cup of tea in the USA. Many thanks to Danielle Brousseau from Avalee Photography for this lovely picture.
Remember to subscribe to a weekly newsletter not to miss a single pattern and tutorial. And you can also follow me on Facebook, Pinterest and Instagram.


I can't find the free pattern for Riki bear
ReplyDeleteOnly heart pattern is free. Pattern for Rikki the bear is available for purchase. Please, follow links in the blog post.
DeleteThank you for the heart pattern! While I can never seem to make the numbers match each time, my end result still looks like an adorable stuffed heart. I am making a bunch of them for my 3rd grader's classmates, who are hanging them on their backpacks! Love it!
ReplyDelete