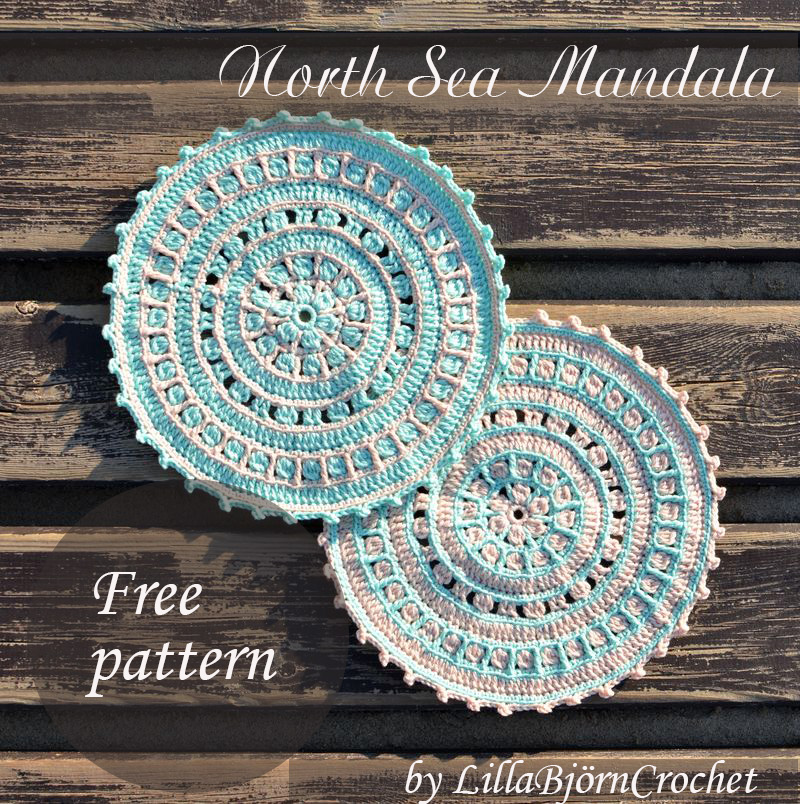
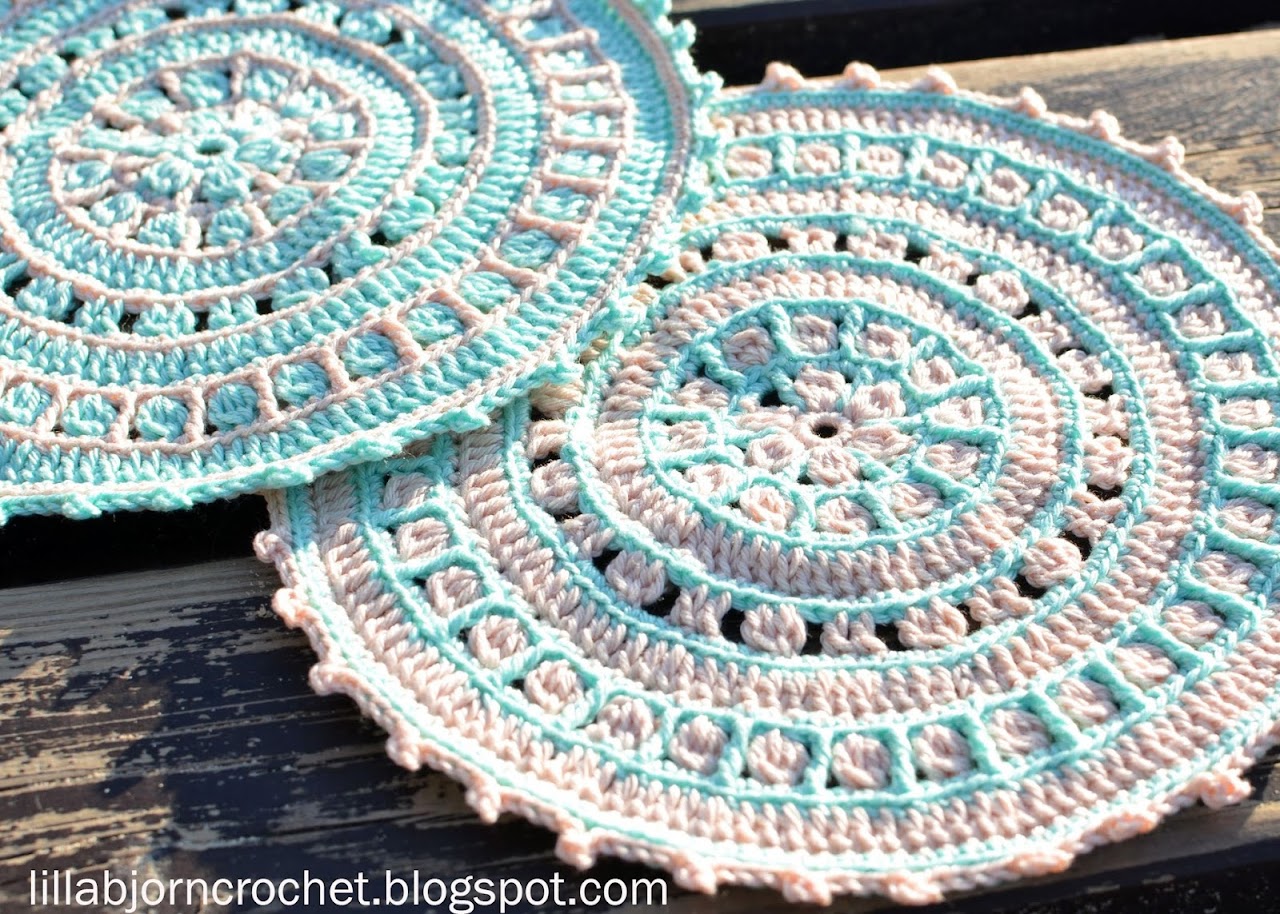
Two weeks ago I came back from a wonderful vacation in Belgium by the North Sea. I was inspired by beautiful sea landscapes and dunes, pale sun light and gray waves. And I came up with an idea of a new mandala design. You can see some pictures and read about it here. North Sea Mandala is back from testers and I am happy to introduce a new free crochet pattern! It is very easy to follow with lots of step-by-step pictures. Using it you can create nice Mandala potholders and matching coasters. I used Larra cotton yarn by Scheepjes to crochet my North Sea Mandala in two colors – peach and turquoise. Those in my opinion go together perfectly! Two skeins were enough for me to crochet two mandalas and 4 coasters (though, please, note that I am a rather tight crocheter). I hope you will enjoy this pattern.
Dutch version of North Sea Mandala pattern is available as pdf download HERE. The translation was kindly made by Jeannette Kemp.
What you will need:
- Yarn in two colors. I used yarn “Larra” by Scheepjes (50g/1.76 oz., 125 m/137 yds.) Yarn weight: Sport. Texture: 5 ply (12 wpi)
- Crochet hook 2.5 mm (C)
- Scissors, tapestry needle to weave in ends.
Finished size
The size of the finished mandala depends on the yarn and hook you use. My mandala is approx. 20 cm (8”) large.Gauge is not very important for this pattern but your mandala should stay flat!
Note
This mandala is worked in rounds with color change on every round. I used "needle join" to join the rounds but, please, feel free to do it in a way you are used to - with slip stitches, for example. you can also weave in yarn tail "as-you-go".Stitch guide and Abbreviations
US standard abbreviations are used in this pattern. But if you are used to other terms, please check this Crochet Translation Project which might be helpful in translation to your language.
rnd - round
st(s) - stitch(es)
ch - chain
sp(s) - space(s)
yo - yarn over
lp(s) - loop(s)
FL - front loop(s)
BL - back loop(s)
NJ - needle join
sk - skip st(s)
*…* - *crochet following directions* as many times as indicated
slst (slip stitch) - insert hook in indicated st, yo, draw yarn up and pull 2nd lp through the 1st lp on hook.
sc (single crochet) - insert hook in indicated stitch, yo, draw up a lp, yo and pull through both lps on hook.
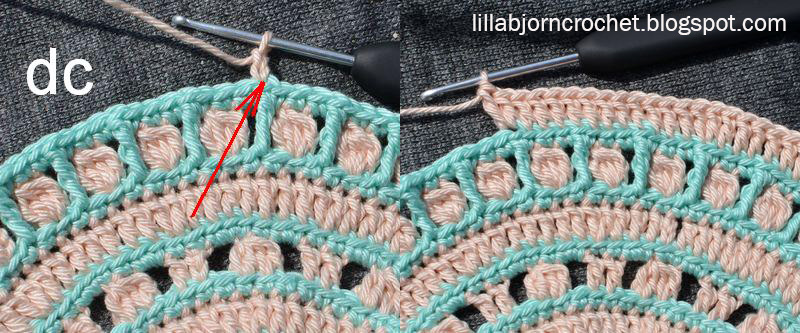
dc (double crochet) – yo, insert hook in indicated st, yo, draw up a lp, *yo, pull through 2 lps* twice.
dc4tog (double crochet 4 together) – *yo, insert hook in indicated st, yo, draw up a lp, yo, pull through 2 lps* 4 times all in same st, yo, pull through all 5 lps on hook.
tr (treble crochet)– yo twice, insert hook in indicated st, yo, draw up a lp, *yo, pull through 2 lps* three times.
sc inc - single crochet increase
dc inc - double crochet increase
Copyright LillaBjornCrochet 2015. All rights reserved. This pattern is for unlimited personal use only. Do not reproduce or sell the pattern. The pattern may not be copied in any way (print or digitally), in part or in full. Items may be sold that are made from this pattern as long as the designer is credited. Shop owners, if you wish to make a kit with yarn using this pattern, please request permission and copyright details from me before offering any kits for sale. Please, read Copyright page for more information.
Instructions
Add this Pattern to your Ravelry QueueColor key: C1 - peach, C2 - turquiose.
Make a magic ring, ch1 (doesn’t count as sc) and 12 sc inside the ring. Finish with a sl st in the 1st sc after ch1. Don’t fasten off. (= 12 sc)
Rnd 2. Continue with yarn C1. Make this rnd through both lps.
Note: make all dc’s of each dc4tog in the same st of rnd 1. The first dc4tog is made in next sc of rnd 1 after sl st. And 1st dc4tog is ch2+dc3tog.
*1 dc4tog, ch4, sk 1 st on rnd 1* 6 times, NJ in the 1st dc4tog of the rnd. (= 6 dc4tog’s + 6 ch4-sps)
Rnd 3. Change to yarn C2. Attach yarn in any dc4tog (through both lps) of rnd 2. Work this rnd through both lps.
Note: While working tr's you should yo twice and insert the hook through both lps of the underlying st of rnd 1 and bring it to the front of your work. So tr's should be made in front of your work always.
*1 sc in dc4tog (1st sc = ch1), 2 sc in next ch4-sp, 1 tr in the underlying sc of rnd 1 skipped between two dc4tog’s, 2 sc in the same ch4-sp* 6 times, NJ in the 1st sc of the rnd after ch1. (= 36 sts)
Rnd 4. Change to yarn C1. Attach yarn in any tr (BL) of rnd 3. Work this rnd in BL.
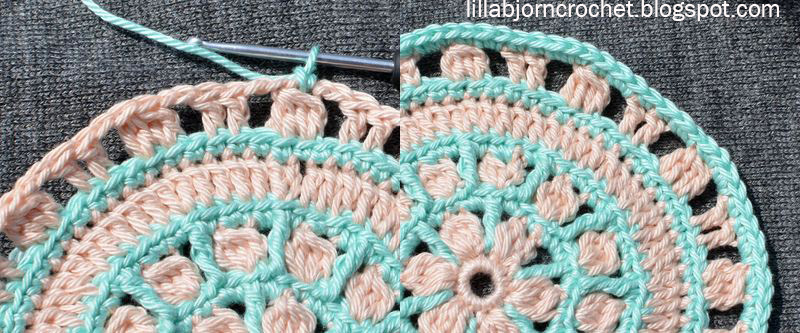
Note: make all dc’s of each dc4tog in the same st of rnd 1. The first dc4tog is made in the same st of rnd 3 where you attached the yarn. And 1st dc4tog is ch2+dc3tog. To avoid holes while crocheting in BL, please, see this TIP.
*1 dc4tog (BL), ch3, sk 2 sts on rnd 3* 12 times, finish with sl st in the 1st dc4tog of this rnd, fasten off. (= 12 dc4tog’s + 12 ch3-sps).
Rnd 5. Change to yarn C2. Attach yarn in any dc4tog (through both lps) of rnd 4. Work this rnd through both lps.
Note: make tr’s of this rnd in the same way you made them on rnd 3.
*1 sc inc in dc4tog of rnd 4 (1st sc = ch1), 1 sc in next ch3-sp, 1 tr (through both lps) in 2nd of two underlying skipped sts of rnd 3, 1 sc in the same ch3-sp* 12 times, NJ in the 1st sc of the rnd after ch1. (= 60 sts)
Rnd 6. Change to yarn C1. Attach yarn in any tr (BL) of rnd 5. Work this rnd in BL.
*1 dc inc (1st dc = ch2), 4 dc* 12 times, NJ in the 1st dc of the rnd after ch2. (= 72 sts)
Rnd 7. Change to yarn C2. Attach yarn in any st (through both lps) of rnd 6. Work this rnd through both lps.
sc in every st of rnd 6 (1st sc = ch1), NJ in the 1st sc of the rnd after ch1. (= 72 sts)
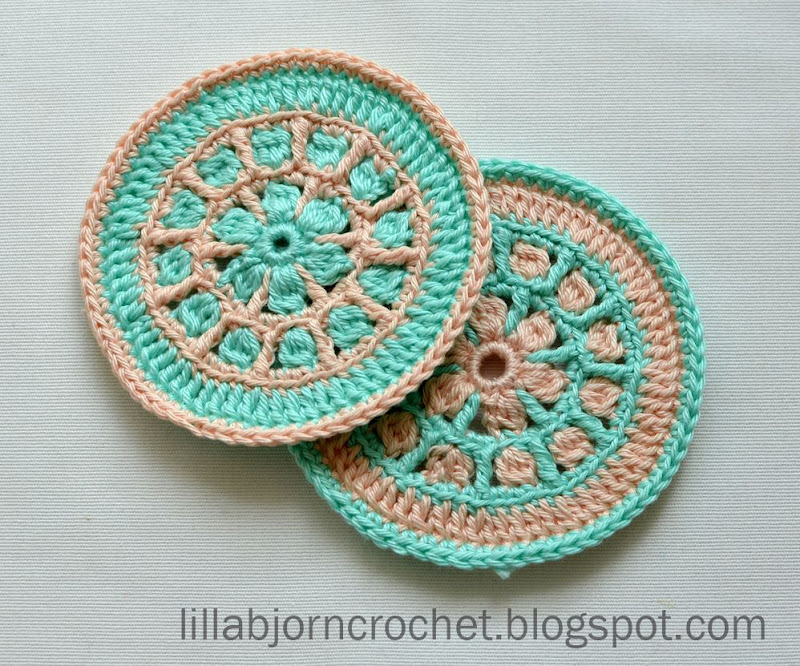
If you finish crocheting after this rnd, you will get a nice small coaster matching your mandala...
Rnd 8. Change to yarn C1. Attach yarn in sc (BL) of rnd 7 made in 2nd dc after any dc inc of rnd 6. Work this rnd in BL.
*1 dc in each of next two sc (1st dc = ch3), ch2, sk 1 st , 1 dc4tog (work 2 dc in each of two next sts of rnd 7), ch2, sk 1 st* 12 times, finish with a sl at in 3rd ch in the beginning of the rnd, fasten off. (= 12 dc4tog’s + 12 dc pairs + 24 ch2-sps).
Rnd 9. Change to yarn C2. Attach yarn in any dc4tog (through both lps) of rnd 8. Work this rnd through both lps.
*1 sc inc in dc4tog (1st sc = ch1), 2 sc in next ch2-sp, 1 sc in each of next 2 dc, 2 sc in next ch2-sp* 12 times, NJ in the 1st sc of the rnd after ch1. (= 96 sts)
Rnd 10. Change to yarn C1. Attach yarn in 2nd st (BL) of any inc of rnd 9. Work this rnd in BL.
*4 dc (1st dc = ch2), 1 dc inc, 3 dc* 12 times, NJ in the 1st dc of the rnd after ch2. (= 108 sts)
Rnd 11. Change to yarn C2. Attach yarn in any st (through both lps) of rnd 10. Work this rnd through both lps.
sc in every st of rnd 10 (1st sc = ch1), NJ in the 1st sc of the rnd after ch1. (= 108 sts)
Rnd 12. Change to yarn C1. Attach yarn in sc (BL) of rnd 11 made in 1st dc of any dc inc of rnd 10. Work this rnd in BL.
Note: make all dc’s of each dc4tog in the same st of rnd 1. The first dc4tog is made in the same st of rnd 3 where you attached the yarn. And 1st dc4tog is ch2+dc3tog.
*1 dc4tog (BL), ch3, sk 2 sts* 36 times, finish with a sl st in 1st dc4tog of the rnd, fasten off. (= 36 dc4tog’s + 36 ch3-sps).
Rnd 13. Change to yarn C2. Attach yarn in any dc4tog (through both lps) of rnd 12. Work this rnd through both lps.
Note: make tr’s of this rnd in the same way you made them on rnd 3 and 5.
*1 sc in dc4tog (1st sc = ch1), 1 sc in next ch3-sp, 1 tr (through both lps) in 2nd of two underlying skipped sts of rnd 11, 1 sc in the same ch3-sp* 36 times, NJ in the 1st sc of the rnd after ch1. (= 144 sts)
Rnd 14. Change to yarn C1. Attach yarn in tr (BL) of rnd 13. Work this rnd in BL.
*1 dc inc (1st dc = ch2), 11 dc* 12 times, NJ in the 1st dc of the rnd after ch2. (= 156 sts)
Rnd 15. Change to yarn C2. Attach yarn in any st (through both lps) of rnd 14. Work this rnd through both lps.
sc in every st of rnd 14 (1st sc = ch1), NJ in the 1st sc of the rnd after ch1. (= 156 sts)
Rnd 16. Change to yarn C1. Attach yarn in a st (BL) of rnd 15 made in the 1st dc after any dc inc of rnd 14. Work this rnd in BL.
*[3 sl st, (1 sl st, ch3, 1 sl st) in next sc] twice, 4 sl st, (1 sl st, ch3, 1 sl st) in next sc* 12 times, finish with a sl st in the 1st sl st of the round. Fasten off. Weave in all yarn tails.
Remember to subscribe to a weekly newsletter not to miss a single pattern and tutorial. And you can also follow me on Facebook, Pinterest and Instagram.











Lovely. I have not tried a mandala yet and I think this one will be it.
ReplyDeleteI’m going to try this for me tooo
DeleteThese are so pretty. I love all the pictures to help along with the written pattern. Thanks so much for sharing it!
ReplyDeleteThank you for sharing! These are beautiful and all your instructions and pictures should make them easy to make!
ReplyDeleteThank you so much. Might have to drop everything to start
ReplyDeleteMine is ready:) Haven`t decided yet how will I use it, thinking of putting into a frame and hang it on the wall, would look great.
ReplyDeleteI enjoyed every minute of making it!
A Big Thank You Tatsiana for sharing this pattern:)
Thank you Andy!!
DeleteMaking a dozen of the smaller size for Christmas coasters. Thanks for such a lovely pattern.
ReplyDeleteLUV,LUV,LUV♡♡♡♡♡♡♡♡
ReplyDeleteThank you Tatsiana for sharing this beautiful pattern with us :)
ReplyDeleteThank you for this gorgeous pattern Tatsiana, I couldn't find any Larra in stock with my usual supplier - but I have some Scheepjes Catona Denim in my stash which are just the right colours so I shall use that instead, I made your Magnus Bear pattern with the same colour Catona denim and he turned out lovely :)
ReplyDeleteThank you very much! I am very curious to see your bear :)
DeleteHi Tatiana. Thank you so much for sharing your patterns with the world! I look forward to getting your emails and I love your designs. I am excited to try this and other mandala patterns. If you are ever in San Diego, California, look me up!
ReplyDeleteI love the look of this mandala... with only two colors its amazing! Would it be difficult to make using 4 colors? And do you recommend starting with the lightest first then dark? Or does the color placement really matter?
ReplyDeleteThis will be my first mandala!
Hi! You can use as many colors as you like! And placement of colors is not really critical here.
DeleteWow! What a beautiful color and mandala..... :-)
ReplyDeleteMay I ask a question about the RND 1? I see a hole on the center,it means I cannot pull the yarn to almost close the ring? Only pull a little to hold a hole?
Thank you!
A very pretty pattern and have enjoyed making it. . I'm going to attempt adding a few more rows to use as a placemat. I look forward to trying out more of your patterns, you describe each step perfectly!
ReplyDeleteCan you keep going and make it into a small blanket or rug? Is that even possible?
ReplyDeleteI'd love to know how to do this too
DeleteAm I the only one to encounter trouble in row 5? I count 4 stitches in the repeat: 1 in the dc4tog + 1 in chain 3 + 1 tr + 1 in chain 3 = 4. This times 12 gives 48 stitches not 60.
ReplyDeleteWhere do I go wrong? Or where is the 5th stitch?
I M having the same problem!!
DeleteHi,I am having problems too. Can you please help out, Tatjana?
DeleteI had the same problem too, so I started increasing the stitches on my own. 1sc in a st, then incr in the next st. Repeat.
DeleteIt's written: 1sc inc in dc4tog. The "missing" increase is there. You need to make 2sc in the dc4tog.
Delete