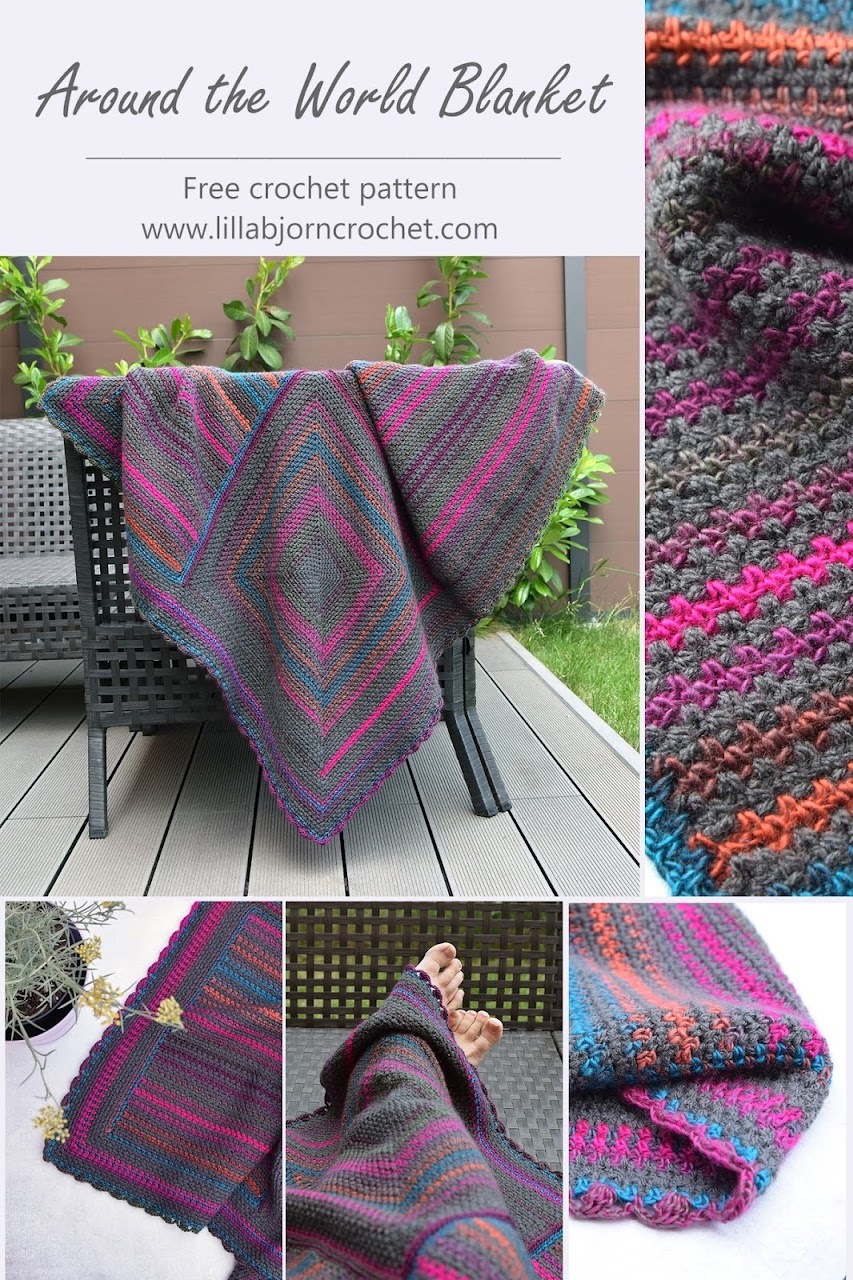
Around the World blanket is a nice example of “mindless crochet”. Easy stitches, minimum counting, and self-patterning yarns are doing all job. I think I will be safe to say this pattern is perfect for beginners. Enjoy!
Add this pattern to your Ravelry Queue
DISCLOSURE: This blog contains affiliate links (marked with *). If you purchase a (any) product via a link on my blog, I get a small percentage contribution from the store which enables me to keep providing you with free patterns. It costs you nothing extra to visit the store via my link, but ensure I get the credit for the sale. Thank you for your support!
Measurements: 1m x 1m = 40” x 40” (can be easily adjusted to any size)
Gauge: 21 sc x 18 rows = 10 x 10cm (4 x 4”)
ch chain stitch
dc4tog (double crochet 4 together): *yo, insert hook in indicated st/sp, yo, draw up a lp, yo, pull through 2 lps* 4 times in same st/sp, yo, pull through all 5 lps on hook.
sc (single crochet): insert hook in indicated stitch, yo, draw up a lp, yo and pull through both lps on hook.
ss (slip stitch): insert hook in indicated st, yo and pull through both lps on hook.
sp(s) space(s)
[…] [repeat following instructions] as many times as indicated
*…* *repeat following instructions* as many times as indicated
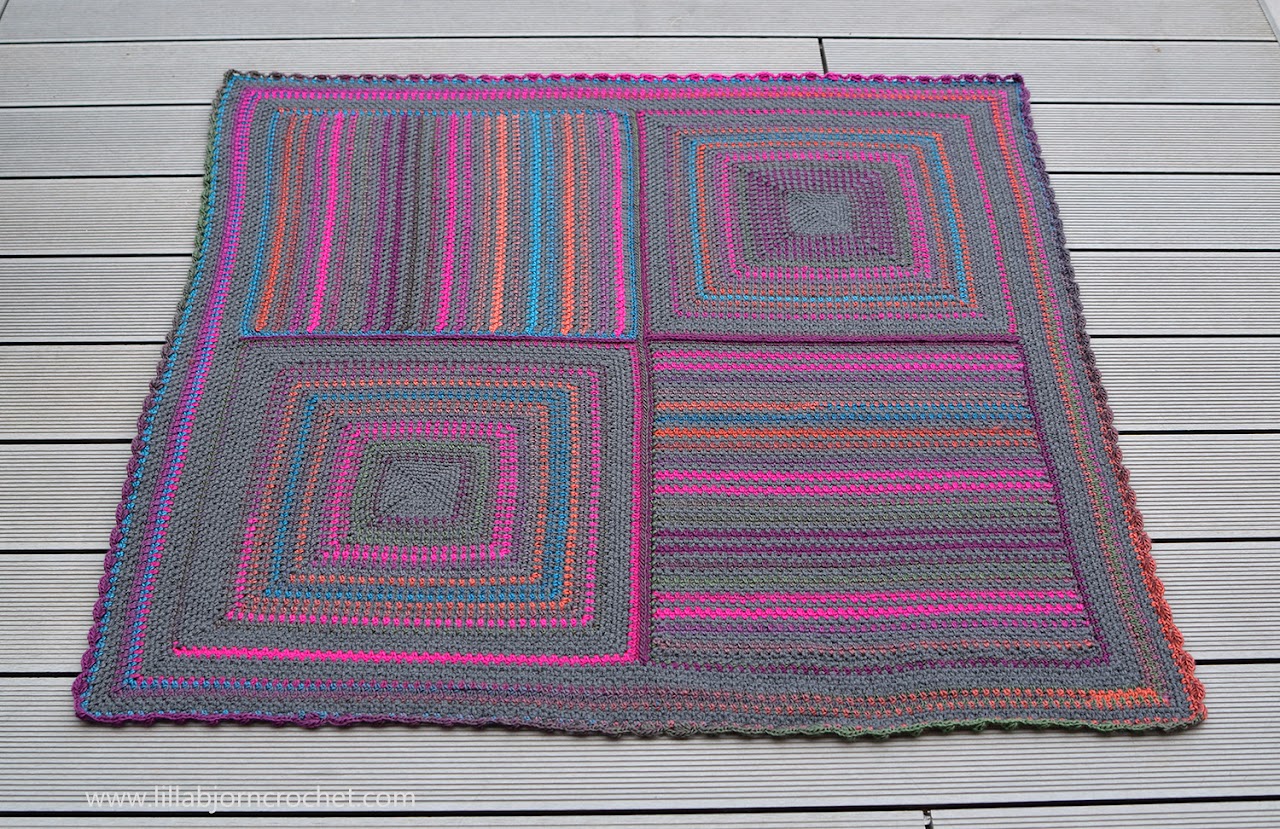
Around the World Blanket consists of four squares (two striped and two granny squares), which are joined with “flat zip” method (or any other joining method) and then the border is added.
INSTRUCTIONS
Copyright LillaBjornCrochet 2018. All rights reserved. This pattern is for unlimited personal use only. Do not reproduce or sell the pattern. The pattern may not be copied in any way (print or digitally), in part or in full. Items may be sold that are made from this pattern as long as the designer is credited. Shop owners, if you wish to make a kit with yarn using this pattern, please request permission and copyright details from me before offering any kits for sale. Please, read Copyright page for more information.
Row 1. With Colour Crafter (CC) ch86, make 1sc in second ch from the hook, 1sc in each st to end, change to Wanderlust (W) in final st, turn. (85 sc)
Row 2. With W. Ch1, 1sc, [ch1, skip 1 st, 1sc in next st] repeat till end, turn. (43 sc, 42 ch1-sps)
Row 3. Continue with W. Ch1, 1sc, 1sc in next sp, [ch1, skip next st, 1sc in next sp] repeat till 1 st left, 1sc in last st (change to CC), turn. (44 sc, 41 ch2-sps)
Row 4. With CC. Ch1, 1sc, [ch1, skip next st, 1sc in next sp] repeat till 2 sts left, ch1, skip next st, 1sc in last st, turn. (43 sc, 42 ch1-sps)
Row 5. Continue with CC. Ch1, 1sc, 1sc in next sp, [ch1, skip next st, 1sc in next sp] repeat till 1 st left, 1sc in last st (change to W), turn. (44 sc, 41 ch2-sps)
Repeat Rows 4-5 (changing yarn after every 2 rows) and make 85 rows in total. Row 85 is made with CC. Change to W in final st, turn.
Round 1. With W. Ch2 (counts as ch2-sp in the corner), 1sc, [ch1, skip next st, 1sc in next sp] repeat till 2 sts left, ch1, skip 1 st, (1sc, ch2, 1sc) in last st, turn a quarter and continue along the edge;
[ch1, 1sc in stripe of next color] repeat till next corner (40 sc in total), ch1, (1sc, ch2, 1sc) in first foundation ch, turn a quarter and continue along the bottom;
[ch1, skip next foundation ch, 1sc in next foundations ch] repeat till 2 ch left, ch1, (1sc, ch2, 1sc) in last foundation ch, turn a quarter and continue along the edge (insert the hook under the floats of yarn);
[ch1, 1sc in stripe of next color] repeat till next corner (40 sc in total), ch1, 1sc in same st where first sc of the round was made, join with ss in first ch2. (43 sc and 42 ch1-sps on each side, ch2-sp in each corner)
Round 2. Continue with W. [Ch2, 1sc in same sp, *ch1, skip next st, 1sc in next sp* repeat till 1sc left before the corner, ch1, skip next st, 1sc in next ch2-sp] repeat 4 times in total, join with ss in first ch2-sp. Fasten off. (44 sc and 43 ch1-sps on each side, ch2-sp in each corner)
Weave in ends, block to measurements.
Finished size after blocking: 43 x 43 cm (17” x 17”)
Round 1. With CC. Make magic ring, [ch2, 1sc in magic ring] x4, join with ss in first ch2-sp. (4 sc, 4 ch2-sps)
Round 2. Continue with CC up to Round 9. [Ch2, 1sc in same sp, ch1, skip next st, 1sc in next ch2-sp] x4, join with ss in first ch2-sp. (2 sc and 1 ch1-sp on each side, ch2-sp in each corner)
Round 3. [Ch2, 1sc in same sp, *ch1, skip next st, 1sc in next sp* repeat till corner making last sc in ch2-sp in the corner] x4, join with ss in first ch2-sp. (3 sc and 2 ch1-sps on each side, ch2-sp in each corner)
Repeat Round 3 to the end of the square changing yarn in the following way:
Rounds 4-8 with CC.
Rounds 9-37 (29 rounds) – begin with W and change colour after every round. Don’t cut the yarn after every round but carry it to the next rounds on the back of your work.
Round 38-42 (5 rounds) with CC.
Rounds 43-44 (2 rounds) with W. After Round 44: 44 sc and 43 ch1-sps on each side, ch2-sp in each corner. Fasten off. Weave in ends. Block to measurements.
Join squares together using W and the ‘flat zip method’ into a grid of 2 x 2 squares. Feel free to use any other joining method you prefer. More information about joining methods HERE.
Round 1. With RS facing up attach CC in any ch2-sp in the corner of a large square. Each seam counts as one st.
[Ch2, 1sc in same sp, *ch1, skip next st, 1sc in next sp* repeat till corner making last sc in ch2-sp in the corner] x4, join with ss in first ch2-sp. (90 sc and 89 ch1-sps on each side, ch2-sp in each corner)
Repeat Round 1: 4 rounds with CC, 5 rounds with W, 3 rounds with CC, 1 round with W. Don’t fasten off.
Next round. Note: If you are making the blanket in different size, you will have to improvise with stitch count on this round. Make sure you place dc4tog in every corner, and otherwise you might need to skip different number of stitches in the end on each side.
Ch3 (doesn’t count as st), [1dc4tog in ch2-sp in the corner, ch3, skip 1 st+sp+1 st, 1sc in next sp, ch3, skip next st+sp, *1dc4tog in next st, ch3, skip next sp+st, 1sc in next sc, ch3, skip next sp+st* till corner] x4, join with ss in first dc4tog, fasten off.
Congratulations!! Your Around the World blanket is now finished!
Subscribe to a newsletter not to miss a single post. You can also follow me on Facebook, Pinterest and Instagram.

Add this pattern to your Ravelry Queue
*Purchase an ad-free and ready-to-print PDF of this pattern in ENGLISH (including all Important Notes, material list, stitch guide, complete instructions and photo tutorials) HERE on Ravelry and HERE on Etsy.
Materials:
- Scheepjes Wanderlust (50% acrylic, 100g/232m) x4 balls of Las Vegas (458), Scheepjes Colour Crafter (100% acrylic, 100g/300m) x3 balls of Pollare (2018)
- 4mm (US G/6) crochet hook*
- Scissors, tapestry needle to weave in ends.
DISCLOSURE: This blog contains affiliate links (marked with *). If you purchase a (any) product via a link on my blog, I get a small percentage contribution from the store which enables me to keep providing you with free patterns. It costs you nothing extra to visit the store via my link, but ensure I get the credit for the sale. Thank you for your support!
Measurements: 1m x 1m = 40” x 40” (can be easily adjusted to any size)
Gauge: 21 sc x 18 rows = 10 x 10cm (4 x 4”)
Abbreviations and Stitch Guide (US crochet terms)
ch chain stitch
dc4tog (double crochet 4 together): *yo, insert hook in indicated st/sp, yo, draw up a lp, yo, pull through 2 lps* 4 times in same st/sp, yo, pull through all 5 lps on hook.
sc (single crochet): insert hook in indicated stitch, yo, draw up a lp, yo and pull through both lps on hook.
ss (slip stitch): insert hook in indicated st, yo and pull through both lps on hook.
sp(s) space(s)
[…] [repeat following instructions] as many times as indicated
*…* *repeat following instructions* as many times as indicated
Pattern Notes
Around the World Blanket consists of four squares (two striped and two granny squares), which are joined with “flat zip” method (or any other joining method) and then the border is added.
INSTRUCTIONS
Copyright LillaBjornCrochet 2018. All rights reserved. This pattern is for unlimited personal use only. Do not reproduce or sell the pattern. The pattern may not be copied in any way (print or digitally), in part or in full. Items may be sold that are made from this pattern as long as the designer is credited. Shop owners, if you wish to make a kit with yarn using this pattern, please request permission and copyright details from me before offering any kits for sale. Please, read Copyright page for more information.
Striped Square (make two)
- Striped Square is worked in rows back and forth. The yarn is changed after every two rows on the last yarn over when there are still 2 loops on hook. Don’t cut the yarn and carry it to next rows.
- Ch1 in the beginning of each row doesn’t count as a st. So first sc of each row is made in last stitch of previous row.
Row 1. With Colour Crafter (CC) ch86, make 1sc in second ch from the hook, 1sc in each st to end, change to Wanderlust (W) in final st, turn. (85 sc)
Row 2. With W. Ch1, 1sc, [ch1, skip 1 st, 1sc in next st] repeat till end, turn. (43 sc, 42 ch1-sps)
Row 3. Continue with W. Ch1, 1sc, 1sc in next sp, [ch1, skip next st, 1sc in next sp] repeat till 1 st left, 1sc in last st (change to CC), turn. (44 sc, 41 ch2-sps)
Row 4. With CC. Ch1, 1sc, [ch1, skip next st, 1sc in next sp] repeat till 2 sts left, ch1, skip next st, 1sc in last st, turn. (43 sc, 42 ch1-sps)
Row 5. Continue with CC. Ch1, 1sc, 1sc in next sp, [ch1, skip next st, 1sc in next sp] repeat till 1 st left, 1sc in last st (change to W), turn. (44 sc, 41 ch2-sps)
Repeat Rows 4-5 (changing yarn after every 2 rows) and make 85 rows in total. Row 85 is made with CC. Change to W in final st, turn.
Edge
Round 1. With W. Ch2 (counts as ch2-sp in the corner), 1sc, [ch1, skip next st, 1sc in next sp] repeat till 2 sts left, ch1, skip 1 st, (1sc, ch2, 1sc) in last st, turn a quarter and continue along the edge;
[ch1, 1sc in stripe of next color] repeat till next corner (40 sc in total), ch1, (1sc, ch2, 1sc) in first foundation ch, turn a quarter and continue along the bottom;
[ch1, skip next foundation ch, 1sc in next foundations ch] repeat till 2 ch left, ch1, (1sc, ch2, 1sc) in last foundation ch, turn a quarter and continue along the edge (insert the hook under the floats of yarn);
[ch1, 1sc in stripe of next color] repeat till next corner (40 sc in total), ch1, 1sc in same st where first sc of the round was made, join with ss in first ch2. (43 sc and 42 ch1-sps on each side, ch2-sp in each corner)
Round 2. Continue with W. [Ch2, 1sc in same sp, *ch1, skip next st, 1sc in next sp* repeat till 1sc left before the corner, ch1, skip next st, 1sc in next ch2-sp] repeat 4 times in total, join with ss in first ch2-sp. Fasten off. (44 sc and 43 ch1-sps on each side, ch2-sp in each corner)
Weave in ends, block to measurements.
Granny Square (make two)
Granny Square is worked in rounds. The rounds are joined in the corner. The yarn is changed in joining ss at the end of previous round.Finished size after blocking: 43 x 43 cm (17” x 17”)
Round 1. With CC. Make magic ring, [ch2, 1sc in magic ring] x4, join with ss in first ch2-sp. (4 sc, 4 ch2-sps)
Round 2. Continue with CC up to Round 9. [Ch2, 1sc in same sp, ch1, skip next st, 1sc in next ch2-sp] x4, join with ss in first ch2-sp. (2 sc and 1 ch1-sp on each side, ch2-sp in each corner)
Round 3. [Ch2, 1sc in same sp, *ch1, skip next st, 1sc in next sp* repeat till corner making last sc in ch2-sp in the corner] x4, join with ss in first ch2-sp. (3 sc and 2 ch1-sps on each side, ch2-sp in each corner)
Repeat Round 3 to the end of the square changing yarn in the following way:
Rounds 4-8 with CC.
Rounds 9-37 (29 rounds) – begin with W and change colour after every round. Don’t cut the yarn after every round but carry it to the next rounds on the back of your work.
Round 38-42 (5 rounds) with CC.
Rounds 43-44 (2 rounds) with W. After Round 44: 44 sc and 43 ch1-sps on each side, ch2-sp in each corner. Fasten off. Weave in ends. Block to measurements.
Joining
Join squares together using W and the ‘flat zip method’ into a grid of 2 x 2 squares. Feel free to use any other joining method you prefer. More information about joining methods HERE.
Border
Round 1. With RS facing up attach CC in any ch2-sp in the corner of a large square. Each seam counts as one st.
[Ch2, 1sc in same sp, *ch1, skip next st, 1sc in next sp* repeat till corner making last sc in ch2-sp in the corner] x4, join with ss in first ch2-sp. (90 sc and 89 ch1-sps on each side, ch2-sp in each corner)
Repeat Round 1: 4 rounds with CC, 5 rounds with W, 3 rounds with CC, 1 round with W. Don’t fasten off.
Next round. Note: If you are making the blanket in different size, you will have to improvise with stitch count on this round. Make sure you place dc4tog in every corner, and otherwise you might need to skip different number of stitches in the end on each side.
Ch3 (doesn’t count as st), [1dc4tog in ch2-sp in the corner, ch3, skip 1 st+sp+1 st, 1sc in next sp, ch3, skip next st+sp, *1dc4tog in next st, ch3, skip next sp+st, 1sc in next sc, ch3, skip next sp+st* till corner] x4, join with ss in first dc4tog, fasten off.
Congratulations!! Your Around the World blanket is now finished!
*You can purchase an ad-free and ready-to-print PDF of this pattern in ENGLISH (including all Important Notes, material list, stitch guide, complete instructions and photo tutorial) HERE on Ravelry and HERE on Etsy.
Subscribe to a newsletter not to miss a single post. You can also follow me on Facebook, Pinterest and Instagram.


Thank you for sharing your patterns with tutorials. I am a beginning crocheter and I truly appreciate generous folks like you who share their knowledge and skills with the rest of the world.
ReplyDeleteThank you very much this beautiful pattern of "Around the World".
ReplyDeleteI would like probe to make it.
The colours are fantastic too!
Have a nice weekend!
Marianne