Stained Glass crochet is not a completed concept or a special technique. We call some crochet projects “stained glass” because they remind of stained glass windows. Because of two contrast colors: dark (usually black) for patterning and bright color for the background. I have approached stained glass crochet a few times already. My first design was a Stained Glass Mandala potholder. And later Stained Glass Lantern square/blanket was released. And today I am happy to introduce Stained Glass Wonder - crochet blanket or pillow.
Add this pattern to your Ravelry Queue
The pattern is available for purchase on Ravelry and Etsy with 20% discount through Monday, April 29, 2019. The price you see is discounted already, and no codes are needed. Later the pattern will be listed at a regular price.
Stained Glass effect can be achieved with different crochet techniques: overlay, mosaic or tapestry. The patterns should not necessarily be tricky, and even with simple stitches the result would be stunning.
Variegated and self-patterning yarns in combination with solid shades work even better. The advantage is that there are almost no ends to weave, as we change yarn on every round without cutting it, but simply carry yarn up to the next round on the back side.
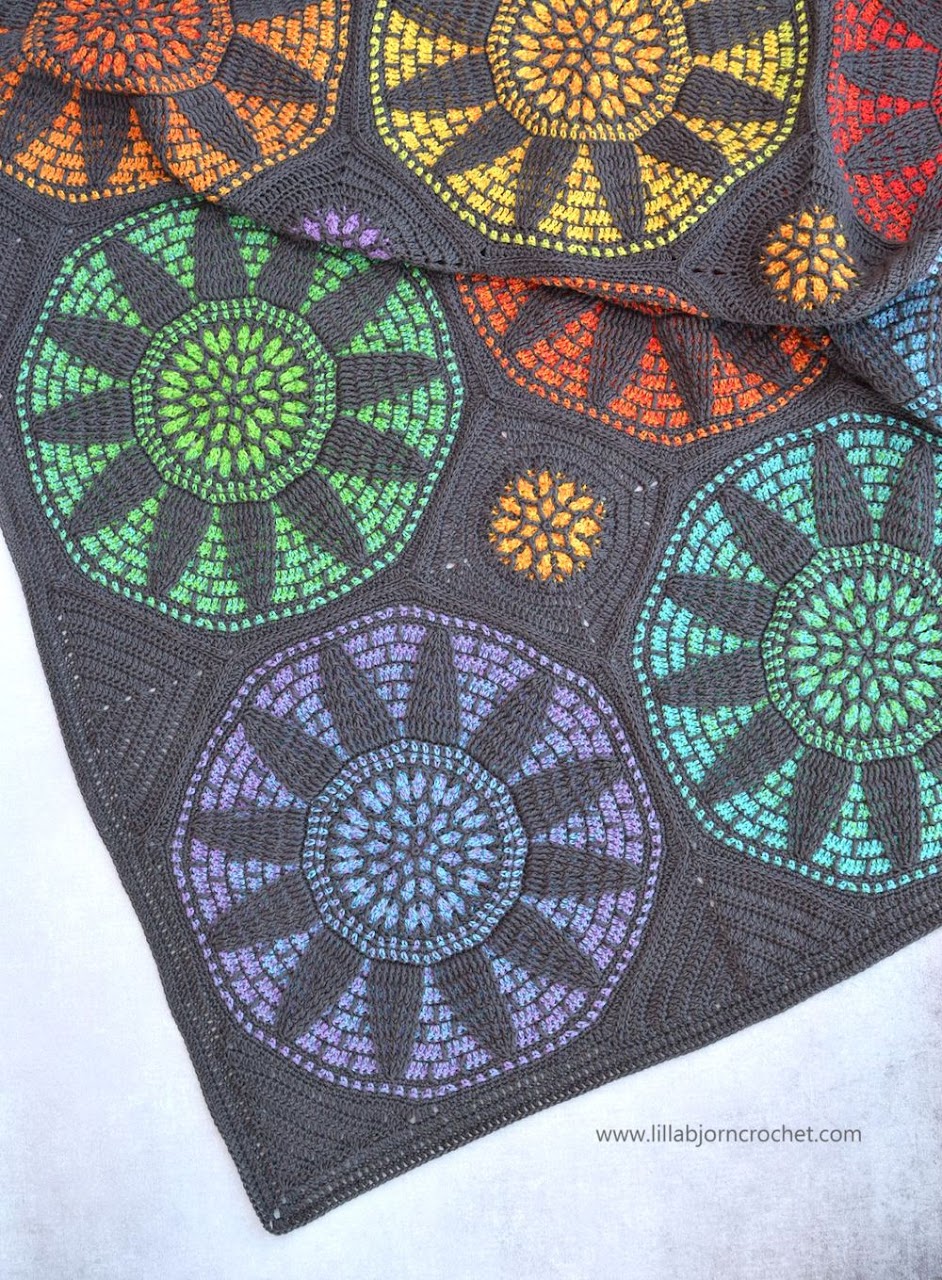
For Stained Glass Wonder blanket I used a kind of overlay crochet. Long stitches are "anchored" around stitches of the same color from several rounds below. Only one color is used per round, and yarns are changed in joining slip stitch. The pattern contains lots of progress pictures showing placement of every stitch.
My initial idea was to create a pillow with just one circle shaped into a square. I have a T-shirt with an owl drawing who has two eyes, reminding dream catchers. And once in the morning when I looked into a mirror and saw these mandalas, I thought something like that would look nice in crochet.
I chose Scheepjes Colour Crafter* and Wanderlust* yarns for a pillow. But when it was almost finished, I thought it would be lovely to maybe crochet a blanket with Scheepjes Whirl and Whirlette yarns.
By the way, isn’t my pillow a perfect match for a Stained Glass Lantern blanket?..
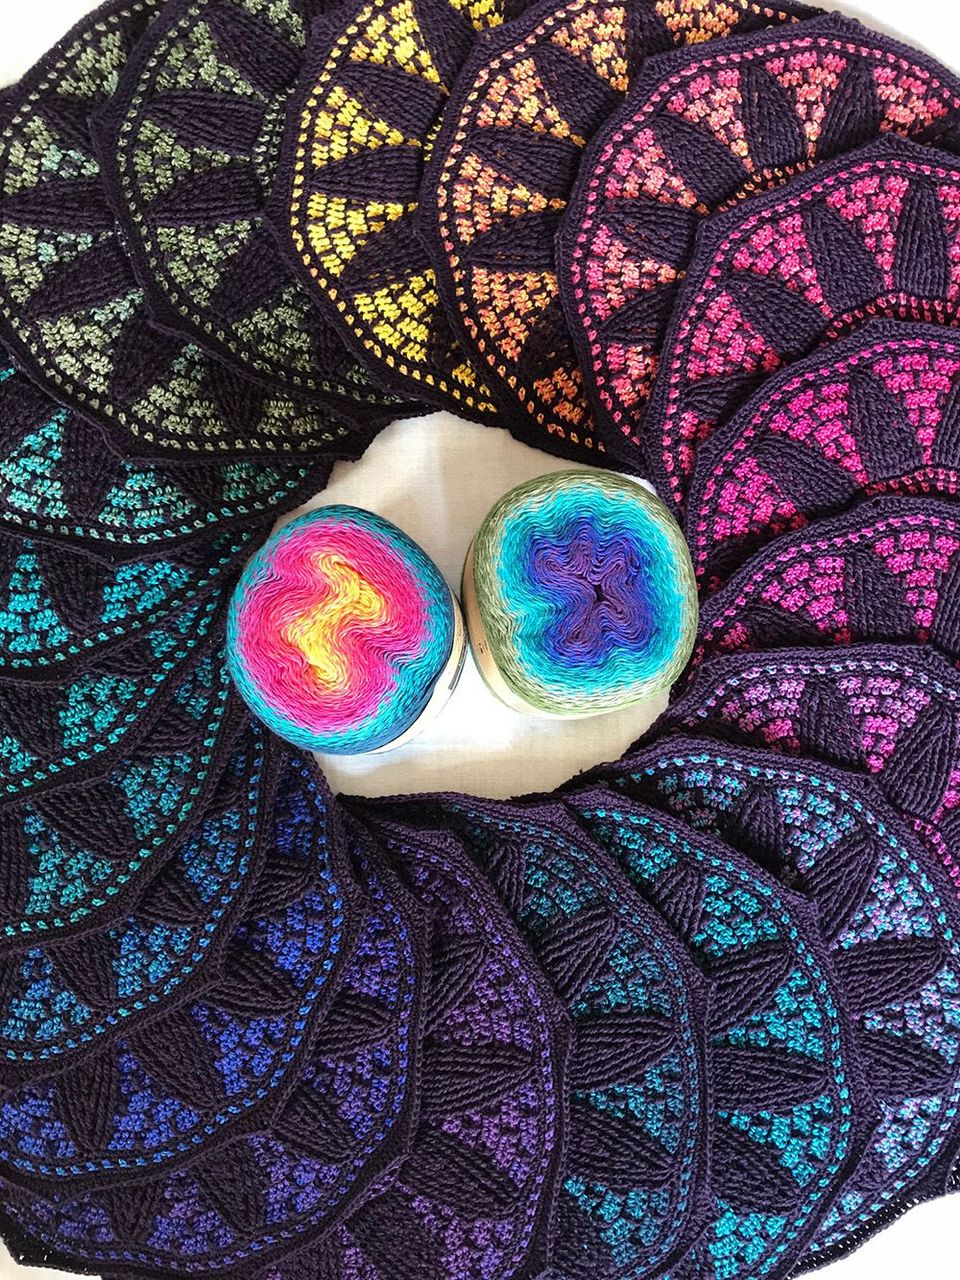
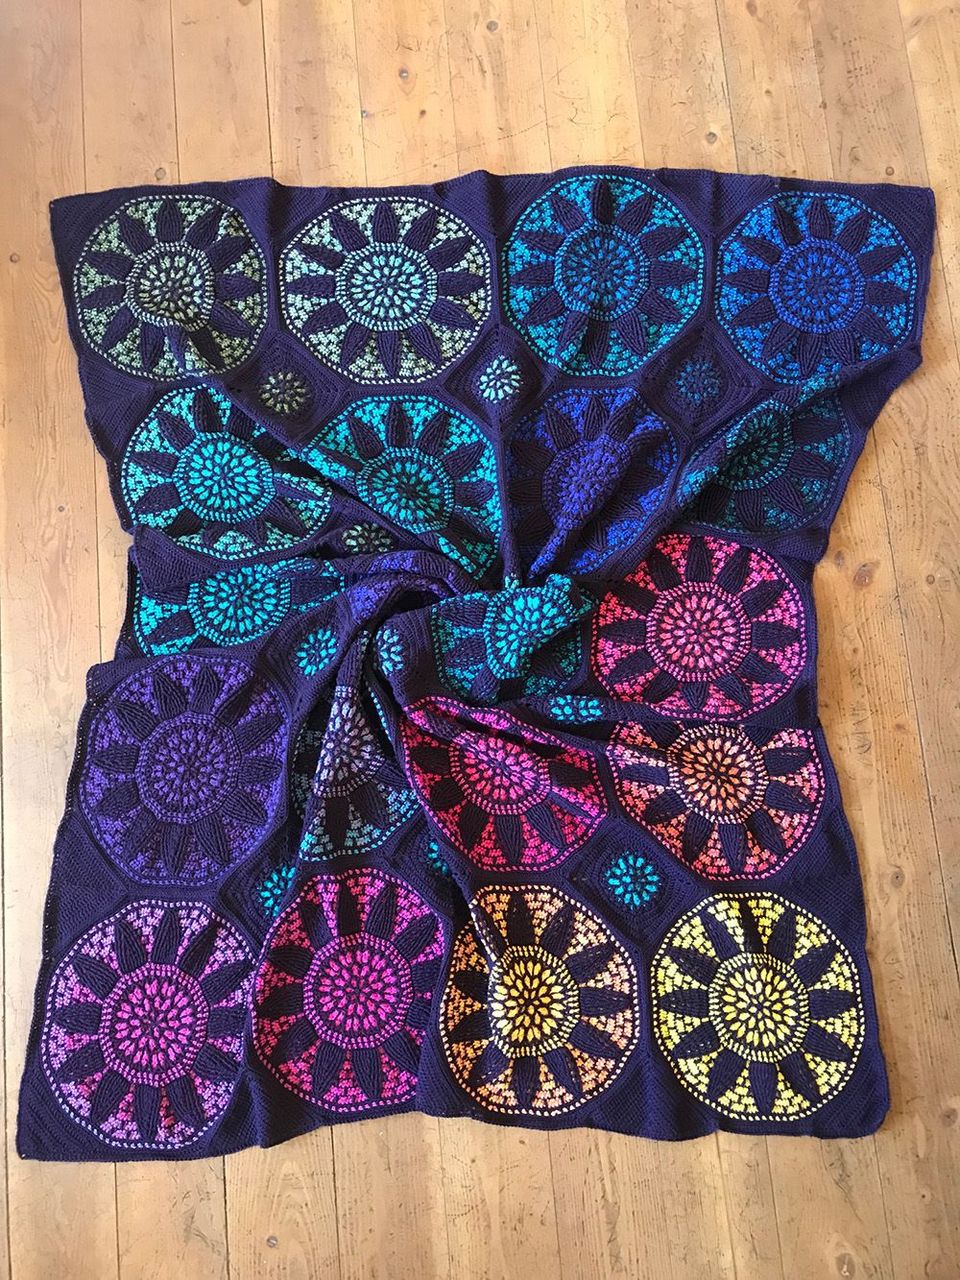
When I talked this idea to Laura Jackson, who was helping me to test the pattern, she became very enthusiastic and decided to create large blanket using 2 Whirl cakes and 9 Whirlettes. Her choice is Blackberry Mint Chip (769) and Rosewater Cocktail (776) in combination with Grappa Whirlette (855).
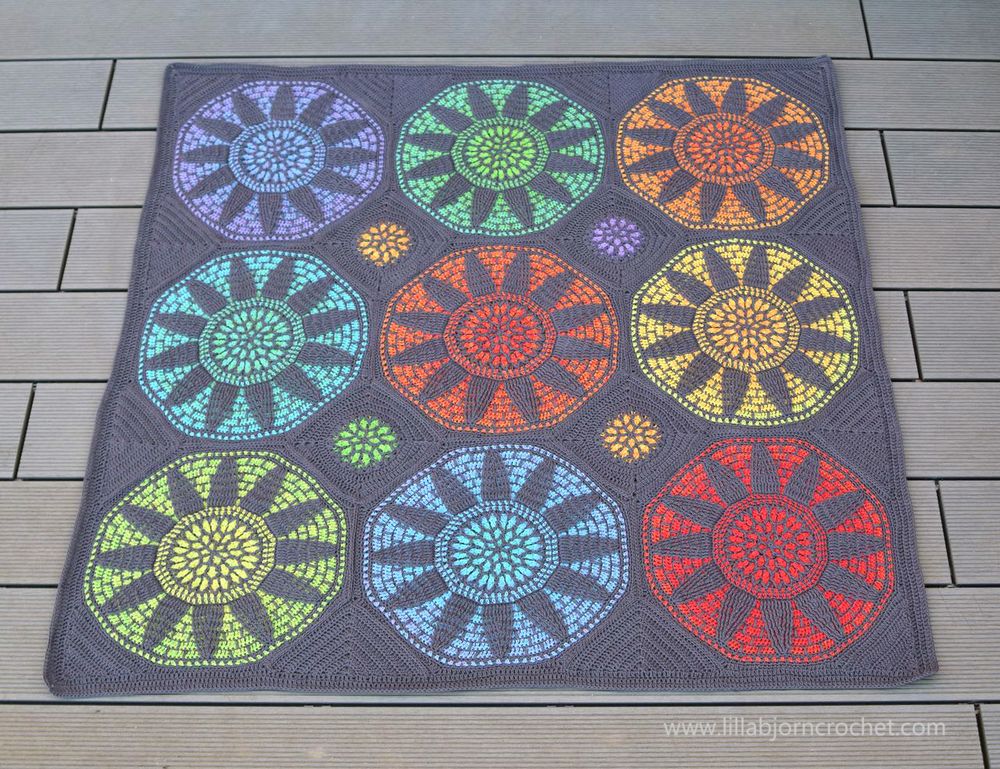
And I made a smaller version with just one Whirl in Jumpin Jelly (759) and 4 Chewy Whirlettes (865) - for a little bit muted look.
Whirl and Whirlette yarn are available for purchase in local Scheepjes shops and also via online retailers (affiliate links are marked with *):
Wool Warehouse*, Black Sheep Wools*, Deramores* (all in UK with international shipping), Caro's Atelier* (NL and Europe), Taemombo (US&Canada), Knotty House* (Canada)
Check out projects by other testers (sending many thanks their way). They used different yarns and color combinations.
Larger version consists of 20 mandala octagons and is approx. 136 x 170cm (53.5 x 67 in), and my smaller version has 9 octagons and is approx. 102 x 102 cm (40 x 40 in).
Spaces between octagons are filled with joining motifs: small squares, side and corner triangles. Instructions on how to make all elements are given in the pattern.
And just to remind that the pattern is available for purchase on Ravelry and Etsy with 20% discount through Monday, April 29, 2019. The price you see is discounted already, and no codes are needed. Later the pattern will be listed at a regular price.
Hope you enjoy :)
Subscribe to a newsletter not to miss a single post. You can also follow me on Facebook, Pinterest and Instagram.

 |
| Photo credit: Laura Jackson |
Add this pattern to your Ravelry Queue
The pattern is available for purchase on Ravelry and Etsy with 20% discount through Monday, April 29, 2019. The price you see is discounted already, and no codes are needed. Later the pattern will be listed at a regular price.
Stained Glass effect can be achieved with different crochet techniques: overlay, mosaic or tapestry. The patterns should not necessarily be tricky, and even with simple stitches the result would be stunning.
Variegated and self-patterning yarns in combination with solid shades work even better. The advantage is that there are almost no ends to weave, as we change yarn on every round without cutting it, but simply carry yarn up to the next round on the back side.
For Stained Glass Wonder blanket I used a kind of overlay crochet. Long stitches are "anchored" around stitches of the same color from several rounds below. Only one color is used per round, and yarns are changed in joining slip stitch. The pattern contains lots of progress pictures showing placement of every stitch.
 |
| Photo credit: Laura Jackson |
My initial idea was to create a pillow with just one circle shaped into a square. I have a T-shirt with an owl drawing who has two eyes, reminding dream catchers. And once in the morning when I looked into a mirror and saw these mandalas, I thought something like that would look nice in crochet.
I chose Scheepjes Colour Crafter* and Wanderlust* yarns for a pillow. But when it was almost finished, I thought it would be lovely to maybe crochet a blanket with Scheepjes Whirl and Whirlette yarns.
By the way, isn’t my pillow a perfect match for a Stained Glass Lantern blanket?..
When I talked this idea to Laura Jackson, who was helping me to test the pattern, she became very enthusiastic and decided to create large blanket using 2 Whirl cakes and 9 Whirlettes. Her choice is Blackberry Mint Chip (769) and Rosewater Cocktail (776) in combination with Grappa Whirlette (855).
 |
| Photo credit: Laura Jackson |
And I made a smaller version with just one Whirl in Jumpin Jelly (759) and 4 Chewy Whirlettes (865) - for a little bit muted look.
Whirl and Whirlette yarn are available for purchase in local Scheepjes shops and also via online retailers (affiliate links are marked with *):
Wool Warehouse*, Black Sheep Wools*, Deramores* (all in UK with international shipping), Caro's Atelier* (NL and Europe), Taemombo (US&Canada), Knotty House* (Canada)
Check out projects by other testers (sending many thanks their way). They used different yarns and color combinations.
Larger version consists of 20 mandala octagons and is approx. 136 x 170cm (53.5 x 67 in), and my smaller version has 9 octagons and is approx. 102 x 102 cm (40 x 40 in).
Spaces between octagons are filled with joining motifs: small squares, side and corner triangles. Instructions on how to make all elements are given in the pattern.
 |
| Photo credit: Laura Jackson |
And just to remind that the pattern is available for purchase on Ravelry and Etsy with 20% discount through Monday, April 29, 2019. The price you see is discounted already, and no codes are needed. Later the pattern will be listed at a regular price.
Hope you enjoy :)
Subscribe to a newsletter not to miss a single post. You can also follow me on Facebook, Pinterest and Instagram.


A beautiful stained glass window effect on this lovely blanket.
ReplyDeleteThank you! I just love stained glass windows :) and I am thankful to crochet for a possibility to translate this effect.
DeleteThis pattern is just stunningly beautiful! LOVE it! Thank you for sharing all of your wonderful creations with us. Have a great weekend! --Rita Z. :)
ReplyDeleteThank you very much!
DeleteThis is a gorgeous pattern! I have to have and I want to thank you for the huge sale on your patterns in your Ravelry shop. So hard to choose which to purchase since I love your work. You are incredibly creative!!
ReplyDeleteI am so glad you like it! you can also make a pillow to practice :)
DeleteWhoohoo just ordered the pattern by etsy. Never done this before. Little bit nervous. How long will it take before i got the download?
ReplyDeleteFeeling excitted
Love from the Netherlands
Angelien
Thanks!! Usually it doesn't take long for a download link to be delivered to your e-mail. Make sure to also check your spam folder!
DeleteHi - I bought this beautiful pattern on Ravelry. When I downloaded I got 4 PDFs, 1 of 4 and 2 of 4 in English, and 3 of 4 and 4 of 4 in Dutch. What happened? How can I get 3 of 4 and 4 of 4 in English?
ReplyDeleteThanks!
Juli
What does the back look like?
ReplyDeleteAbsolutely stunning!
ReplyDeleteHi, I'm a bit stuck on Row 31. One pattern I have has x12, another (newer) pattern includes x11. Either way, I'm ending up with too many stitches around.
ReplyDeletePerhaps I'm misunderstanding this portion:
*ch1, skip 1 st, (sc, ch1, sc) in next st, [ch1, skip 1 st, sc in next st] x7* x11,
What should be done x7, and what should be done x11?
Thanks!
Hello! Could you please send me your progress picture? Or if you are on Facebook, please, join my group and post your picture there: https://www.facebook.com/groups/195091287904259/
DeleteI bought the pattern and ordered my yarn. The pattern did not have any working pictures, so I looked up your blog to see if there were any. What I found was on the pattern it says to use Jumpin Jelly but in your blog it it also mentions you used Blackberry Mint Chip and Rosewater Cocktail. Now I am thinking my blanket will not be what I expected. I see now it will be missing the pinks :( Both options should be mentioned on the pattern, as it does show both in the pictures (at least on Ravelry.)
ReplyDeleteHello, the pattern comes in two files. One of them is with progress pictures and another one is print friendly with just the text. If you need need the pictures, please, come back to your download link and redownload the files once again. Regarding yarn, this pattern can be done in any colors at all. the colors in the pattern refer to the exact image you see in the pattern. On Ravelry I showcase blankets made by my testers. And they all used different colors and yarns. If you don't like the original colors as listed in the pattern, you can choose whatever colors you like. the pictures on my blog are for your inspiration. Hope it helps.
DeleteI'm just starting with the pattern and am wondering if there are any instructions about carryimg up the yarn from one row to another? It might be a silly question but I've not worked with yarn this way so could just benefit from a bit of advice. Many thanks 😊
ReplyDeleteAfter the round is finished, just drop yarn behind work and grab yarn of another color to make next round. Don't pull too much, so that floats on the wrong side are not tight.
Delete