Hello and welcome to Week 8 of Rozeta CAL. I can’t believe we are that far
already! The longest rounds are over and today a new bit is waiting for you.
We will grow four corners to square up the mandala. Yes, you heard it right –
all four corners in one week. The very first one might need a bit more time,
as you will be coming through the new shape and joining technique. But next
three corners should be easier and faster. A corner a day and you will be more
than fine and in time for the next week.
Before the Rozeta CAL began I received quite a few e-mails and private messages about joining in the pattern. If there are any seams, and if separate parts should be put together. This week’s instructions will answer all your concerns. No, we will not make separate bits and join them later.
Before the Rozeta CAL began I received quite a few e-mails and private messages about joining in the pattern. If there are any seams, and if separate parts should be put together. This week’s instructions will answer all your concerns. No, we will not make separate bits and join them later.
The corners will be attached to the mandala (or the octagon to be more precise) as-you-go.
Each corner is started with Yarn A (main color). Corners are worked in rows alternating right and wrong sides. And at the end of every row you will skip certain number of stitches on the mandala and then make a slip stitch to attach growing corner to the octagon.
Please, read instructions carefully, especially for the ends of the rows. They will tell you exactly how many stitches you should skip on the octagon (mandala) and where every slip stitch goes. If you count well, the last rows of the corners will be attached in the ch2-spaces on the edge of the mandala.
Written instructions for Week 8 are available on
Scheepjes website HERE. If this is the first time you hear about Rozeta, please check
General Information HERE
and a photo-tutorial for
Special Stitches and Techniques HERE.
Here are a few helpful tips:
~ Always mark the first and the last stitch of every row (and move the marker as you progress). It will help you to see where exactly the first and last stitches of the next rows will go. Honestly, markers will save you time and prevent from frogging in many places.
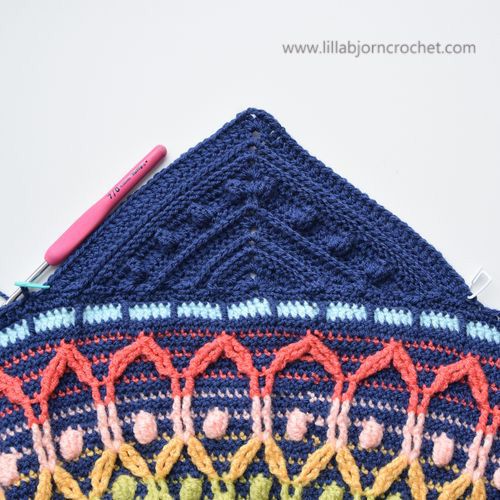
~ Watch the shape and size of your corners carefully. If you switched for the smaller hook on the overlay edge of the mandala, then continue with a smaller hook for corners. Or even change to even smaller hook at some point. The angle of your corner should be approx. 90 degrees. If it’s getting smaller, then you most likely need to adjust your tension.
You can easily check the angle with just a square/rectangular piece of paper. Place it onto your corner as shown in the picture below and watch the edge of your corner. It should be approximately the same angle.
~ DON’T STRESS OUT if your corner is becoming a bit larger or anything. The corners will NOT have ideal shape, but we will add a border around entire blanket later, and we will block it. So any slight differences in shapes should be solved and work themselves out.
~ DON’T STRESS OUT if after nearly finishing the corner you realize you have a bit more or less stitches on the edge of the mandala before next ch2-space. You can improvise and skip more or less stitches than stated in the pattern towards the end of the corner. If the shape of your corner is not vividly weird, there is nothing to worry about.
But of course if your corners look too much asymmetrical or you obviously messed up with something – then you’ll need to frog and remake. But let’s hope that won’t happen.
PHOTO-TUTORIAL
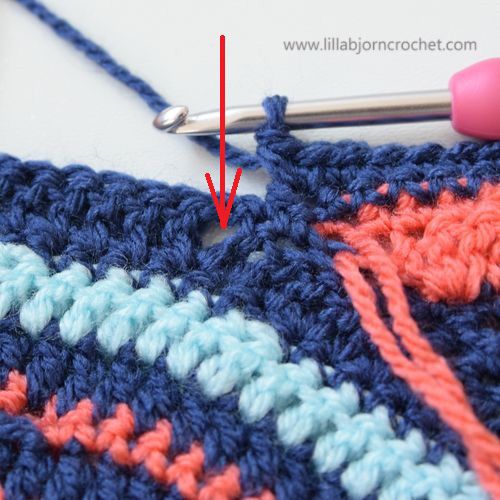
Row 1. It’s very important to find a right placement for the first group of stitches. Follow the instructions in the pattern, find the correct stitch and attach Yarn A in the third stitch before marked one. After Row 1 is finished, be sure to mark the first and last stitch of the row.
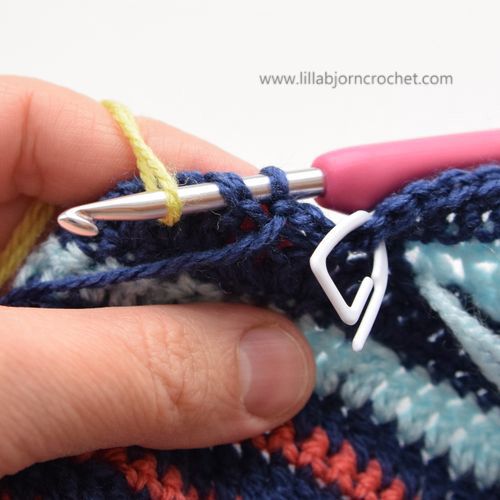
Row 2. This row is made on the wrong side. Stitch markers should help you to find the first and last stitches easily. Be careful when making slip stitches at the end of the round. You should look for the free stitches on the edge of the mandala (after the one which is already occupied with slip stitch from the previous row). If you are not sure, please, watch Esther’s video.
Row 3. We continue to work on right side again. A bit of texture will be added here with back post stitches. A cute ridge will appear on the right side.
Row 4. We continue with the texture and add another ridge by working front post stitches on the wrong side.
Row 5. Nothing special about this row. It should be easy to find the first and the last stitch of the previous row. Please, count total stitches at the end of every row – they are not too many and it will save you lots of nerves on the next rows!
Row 7. We’ll add a bit of texture again – with popcorns this time. There are different ways of making them, but for Rozeta we will do them as 5dc (US terms here and to the end). You’ll have 4 popcorns along each edge.
Row 8. Easy one, but please refer to the pictures below about how I crochet over the popcorns. I insert the hook into the hole. So dc of this row is “growing” from the inside of the popcorn.
Rows 9-11. Repeat previous rows. But please, pay extra attention to the end of Row 11. There is a slight change at the end of the row from Row 5. You’ll be make chains and skip stitches differently. This will be valid for some of the next rows, so please pay full attention to the written instructions.
Row 12. This row is made on the wrong side and it is the last one before we change to a new color. For a neater join (for this row and all next rows on the wrong side), please insert the hook from back to front! This small trick will make the color changes almost invisible. Please, follow instructions for cutting the yarn carefully. And we will not cut Yarn A at any point. It s fastened off only at the very end, when the entire corner is completed.
Here you’ll have an important note about color changes for Colour Crafter version. Please, read it carefully. There will be a change of colors for each two of four corners. Each two opposite corners will be the same and they will slightly differ in colors from another two corners.
Row 13. Here your gauge maybe become slightly relaxed, so please watch your tension and check the angle of the corner as shown in the tips above. Maybe you might even want to change to a smaller hook for next rows.
Row 14. Change back to Yarn A at the end of this row. Again, insert the hook from back to front.
Row 15. This row will remind what we have done in Part 4. Front post stitches will be worked around the stitches of same color from three rows below and you should keep them vertical. To give you a visual tip, FPtr should be placed in central stitches between each pair of popcorns. They will divide popcorns into equal cells.
Row 16. Change to Yarn B (B/C) at the end of this row.
Row 17. This row is similar to Row 13. Popcorns will be placed directly above FPtr below.
Row 19. Similar to Row 15. FPtr will be again placed symmetrically between popcorns. And they should be vertical.
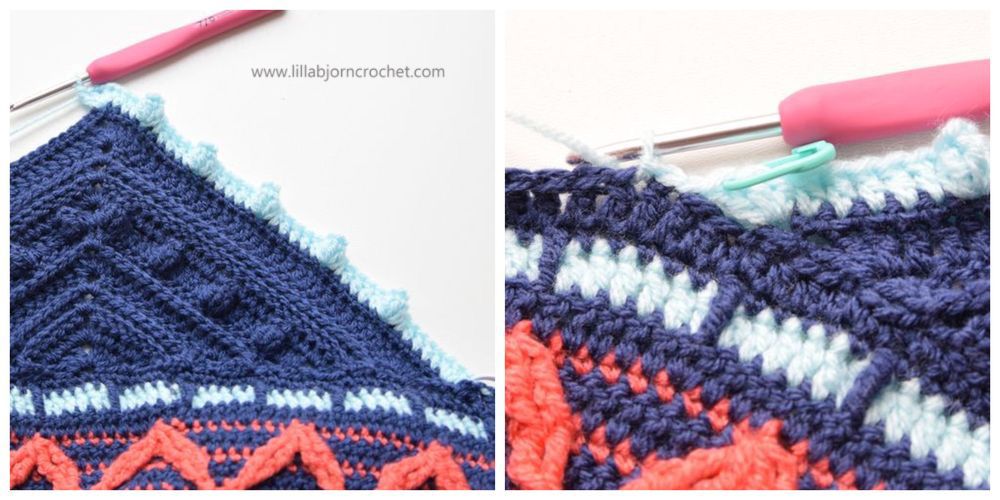
Row 21. At the end of this row magic should happen – you should end one stitch before next ch2-sp in the octagon’s corner. As you can see in the picture below, my magic didn’t really happen, but because my corner looked ok and symmetrical, I didn’t bother to find a mistake and frog. I just tweaked skipped stitches a little bit on the next rows.
Row 23. The magic should happen again and you should end in the ch2-space. YAY!
Row 24. Same as for Row 23. You should end in ch2-sp in the corner (play with skipped stitches if you don’t).
Next Round. You will be working around entire large square with Yarn A. A few decreases will be made. We’ll use the stitches of the different height to shape all the sides and make the square more or less a square.
At the end of this part you can block your square slightly to get ready for the bottom panel. But don’t stretch it too much!!
Hurray! Part 8 is complete! See you next week!
Subscribe to a newsletter not to miss a single post. You can also follow me on Facebook, Pinterest and Instagram.


I started Rozetta Part 8. What fun we got to the corners. I'm still in the first corner. But I'm not sure I understand how to find the second corner location.
ReplyDeleteIs there anyone who has already finished Part 8? How do you count for starting the next corner?
Hello Debi!Did you check writte instructions? They say: " To join yarn for next corner, find next ch2-sp on octagon after fastened off tail from the previous corner. Mark 47th st after this space". Does it help?
DeleteLove your pattern 🙏❤
ReplyDeleteHelo I just finished the first corner and I'm confused too about starting the next corner. When I count the 47 stitches from the chain 2 space which side should be facing me?
ReplyDeleteHi! Working on this in 2020!
ReplyDeleteLoving it so far
I'm on the last round in week 8, completed the (10sc, sc2tog) but if I do the 14sc after, itll leave me too close to the next corner to get the Tr4tog.
any ideas where I went wrong/what to do?
It's very difficult to say where the mistake was. Please, join official Scheepjes groups on Facebook for Rozeta support.
Delete